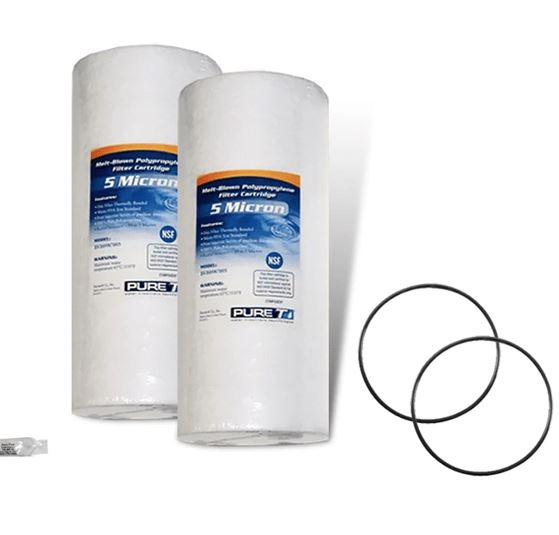
Are you tired of the impurities and contaminants in your tap water? A Springwell water filter can be your ultimate solution for clean and safe drinking water. But, like all good things, your Springwell water filter will eventually require a replacement. In this comprehensive guide, we will not only walk you through the essential steps of Springwell water filter replacement but also shed light on the importance of doing so. Whether you’re a seasoned Springwell user or contemplating your first filter replacement, this user-friendly guide is tailored to meet the needs of anyone in the United States searching for a reliable water filter replacement. To know more about the easy filter replacement method, keep reading!
Why Replace Your Springwell Water Filter?
Before we dive into the replacement process, let’s understand why it’s crucial to replace your Springwell water filter regularly.
Over time, water filters accumulate impurities, sediment, and contaminants from the water they filter. As a result, their efficiency decreases, and they become less effective at providing clean and safe drinking water. Regular replacement ensures that your water filter continues to perform at its best, protecting you and your family from harmful substances.

Our readers get 5% off at springwellwater.com – 👉 Use Code WFIQOFF
When to Replace Your Springwell Water Filter
The frequency of replacement depends on your specific Springwell water filter model and the quality of your water source. Generally, it is recommended to replace your filter every 6 to 12 months. However, some filters may last longer, while others may require more frequent replacement.
To determine the optimal replacement schedule for your filter, consider the following factors:
Filter Type: Different Springwell filter models have varying lifespans. Refer to your filter’s user manual for specific replacement guidelines.
Water Quality: If your water source has a high level of contaminants, you may need to replace your filter more often.
Usage: Filters used for a large household or high water consumption will wear out faster and may need more frequent replacement.
Indicator Lights: Some Springwell filters come with indicator lights that signal when it’s time for a replacement. Pay attention to these alerts.
Replacing Your Springwell Water Filter: Step-by-Step
Now, let’s go through the steps to replace your Springwell water filter:
Step 1: Gather Your Materials
Before you start, make sure you have the following items:
- A replacement Springwell water filter cartridge
- A wrench or filter housing tool (if needed)
- A bucket or towel to catch any water spills
Step 2: Shut Off the Water Supply
Locate the shut-off valve for your water filter system and turn it off. This will prevent water from flowing while you replace the filter.
Step 3: Release Pressure
If your filter housing has a pressure relief button or valve, activate it to release any built-up pressure inside the system. This step is crucial to avoid leaks during replacement.
Step 4: Remove the Old Filter
Use your wrench or filter housing tool to unscrew the filter housing. Carefully remove the old filter cartridge. Be prepared for some residual water to come out when you do this.
Step 5: Install the New Filter
Take your new Springwell water filter cartridge and insert it into the filter housing. Make sure it fits snugly and securely.
Step 6: Tighten the Housing
Using your wrench or filter housing tool, tighten the filter housing back in place. Ensure it’s snug but not overly tight to avoid damage.
Step 7: Turn On the Water Supply
Open the shut-off valve to restore the water supply to your filter system. Check for any leaks around the filter housing. If you notice any, tighten the housing further.
Step 8: Flush the System
Let the water run for a few minutes to flush out any air bubbles and activate the new filter. You may notice some initial cloudiness in the water, which is normal and should clear up.
Step 9: Check for Leaks
Inspect the filter housing and connections for any leaks once more. If everything looks secure, your Springwell water filter replacement is complete!
Wrapping Up
In conclusion, replacing your Springwell water filter is a straightforward process that ensures you continue to enjoy clean and safe drinking water. Remember to follow the recommended replacement schedule and monitor your filter’s performance to protect your family’s health and well-being. If you have any more questions or concerns, feel free to reach out to Springwell’s customer support for assistance. Stay hydrated and stay healthy!
FAQs
How do I know when it’s time to replace my Springwell water filter?
It’s generally recommended to replace your filter every 6 to 12 months, but this can vary based on your specific filter model and water quality. Some filters also have indicator lights that signal replacement time.
Can I replace the filter myself, or do I need a professional?
Most Springwell water filter replacements can be done by homeowners. Just follow the step-by-step guide provided in your user manual. However, if you’re unsure or uncomfortable with the process, it’s always a good idea to consult a professional.
Are Springwell water filter replacements expensive?
The cost of replacement cartridges varies depending on the model and type of filter you have. While it’s an investment in clean water, the price is typically reasonable compared to the benefits of filtered water.
What happens if I don’t replace my Springwell water filter on time?
Delaying filter replacement can lead to decreased filtration efficiency, which means your filter may not effectively remove contaminants. This could compromise the quality of your drinking water.
How can I dispose of the old filter cartridge responsibly?
Many water filter cartridges can be recycled. Check with your local recycling center or the manufacturer’s website for information on how to properly dispose of your used filter cartridge.
